

Installation Time: 30-45 minutes
Parts Included with the Fire Extinguisher Seat Mount that will be used:
(1) Main support bar
(1) Support bar adjuster
(2) Extension arms
(2) Large mounting tabs
(2) Backing plates
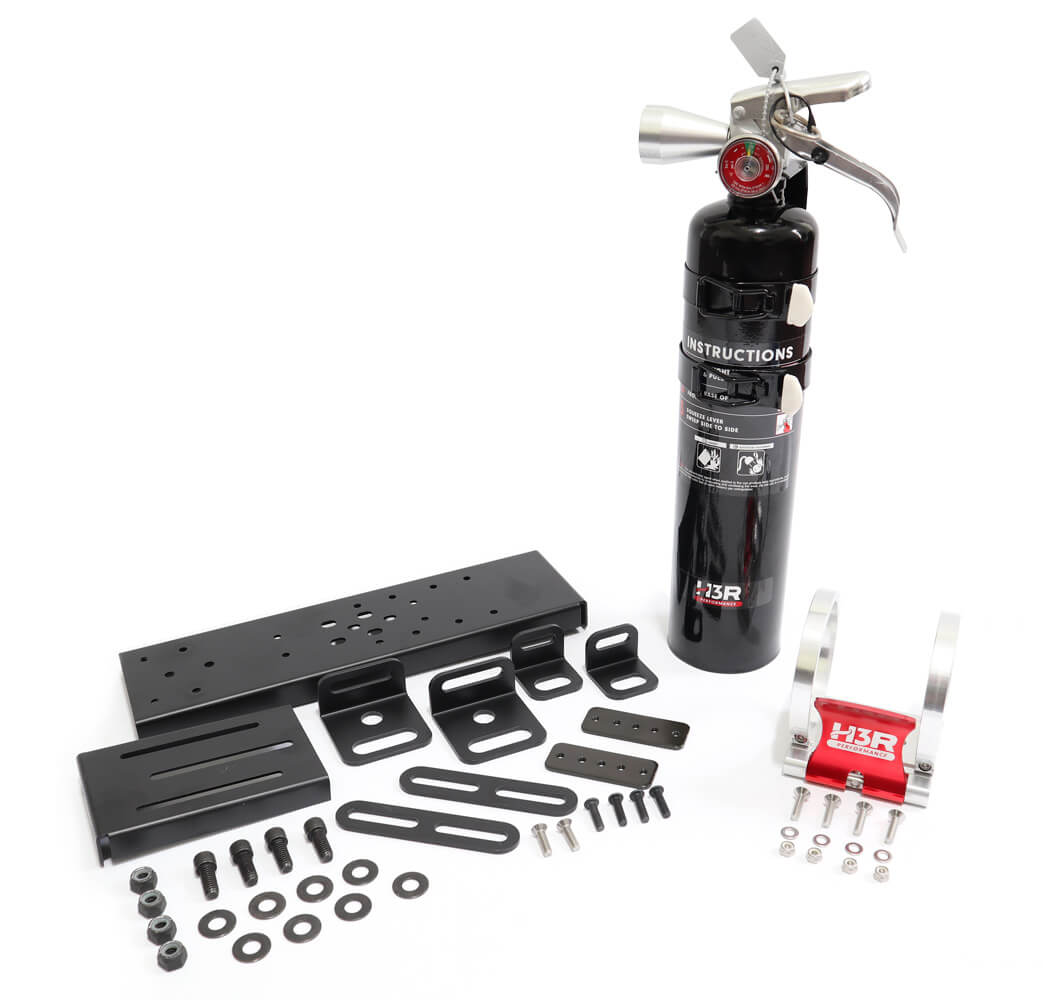
From the seat mount hardware packet you will use:
(4) 5/16” Allen head cap screws
(8) medium washers
(4) 5/16” nylon lock nuts
(2) 10/32” button head screws
(2) 10/32” flush mount screws
From the ProLock hardware packet you will use:
(2) M5 flush mount screws
(2) M5 nylon lock nuts
(2) M5 flat washers
(4) M4 Allen head cap screws
Tools required:
1/4” Allen key
3MM Allen key
1/2” wrench or socket
8MM wrench or socket (5/16” can be used as well)
15MM wrench or socket (for front seat track mounting nuts)
Installation Steps:
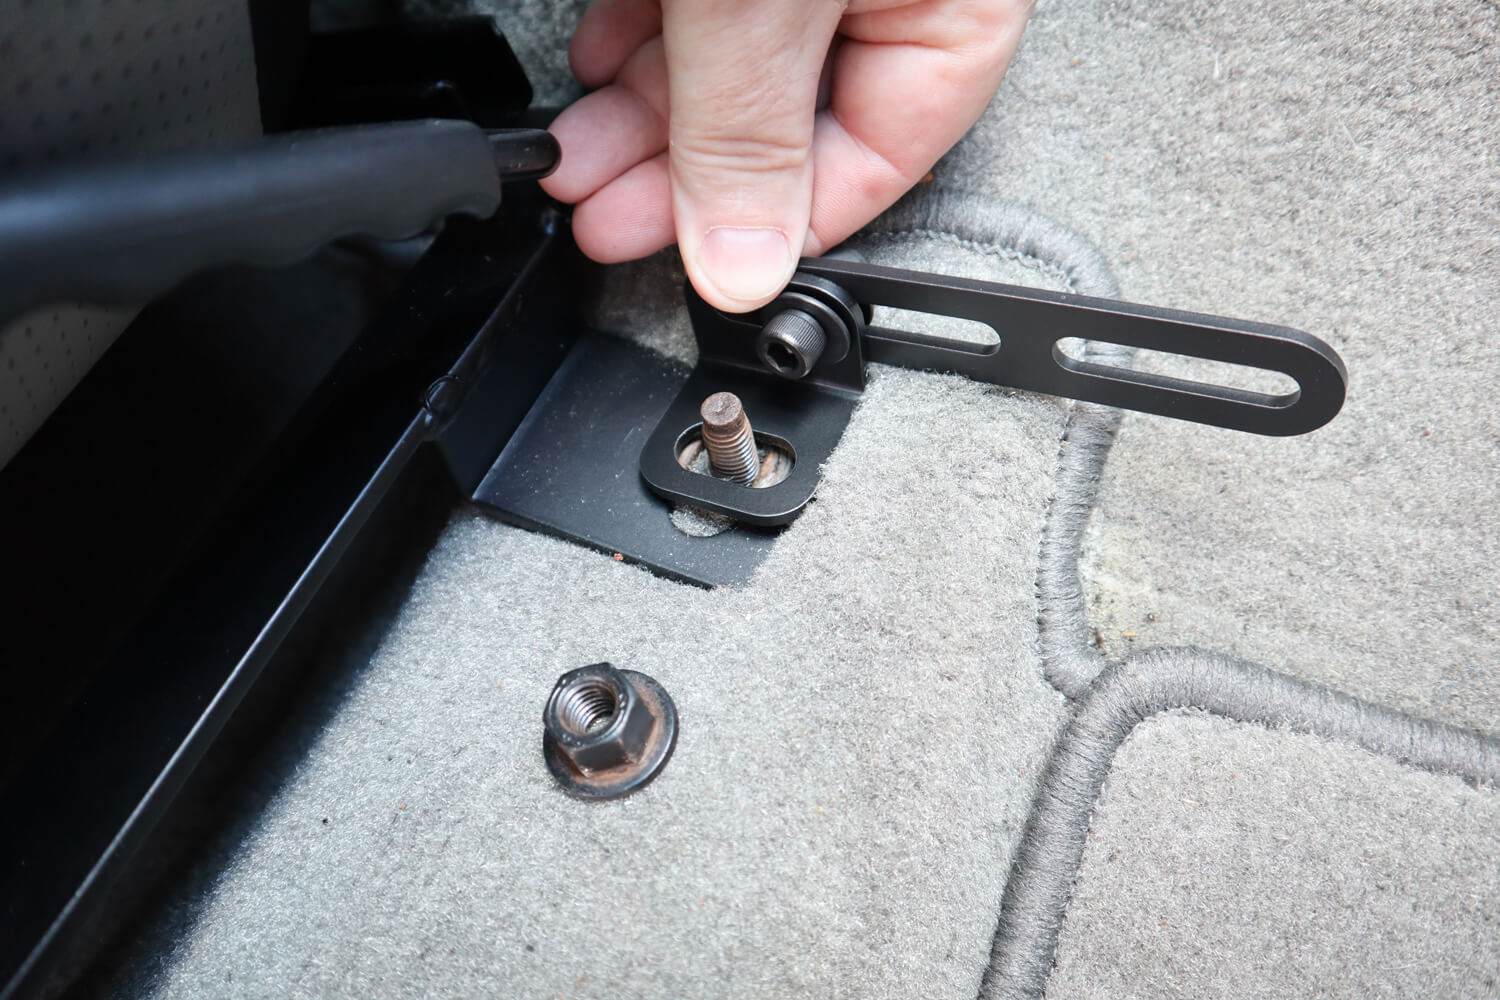
1. Position the passenger front seat rearward for access to the factory seat mounting hardware.
2. Determine the best mounting tab size for your specific needs. We believe the large tab works best for the ’79-’04 Mustang.
3. Loosely assemble the main support bar and the support bar adjuster using the two 10/32” button heads and one of the backing plates. You want to tighten the fasteners enough to still allow the support bar to slide in and out for length adjustments.
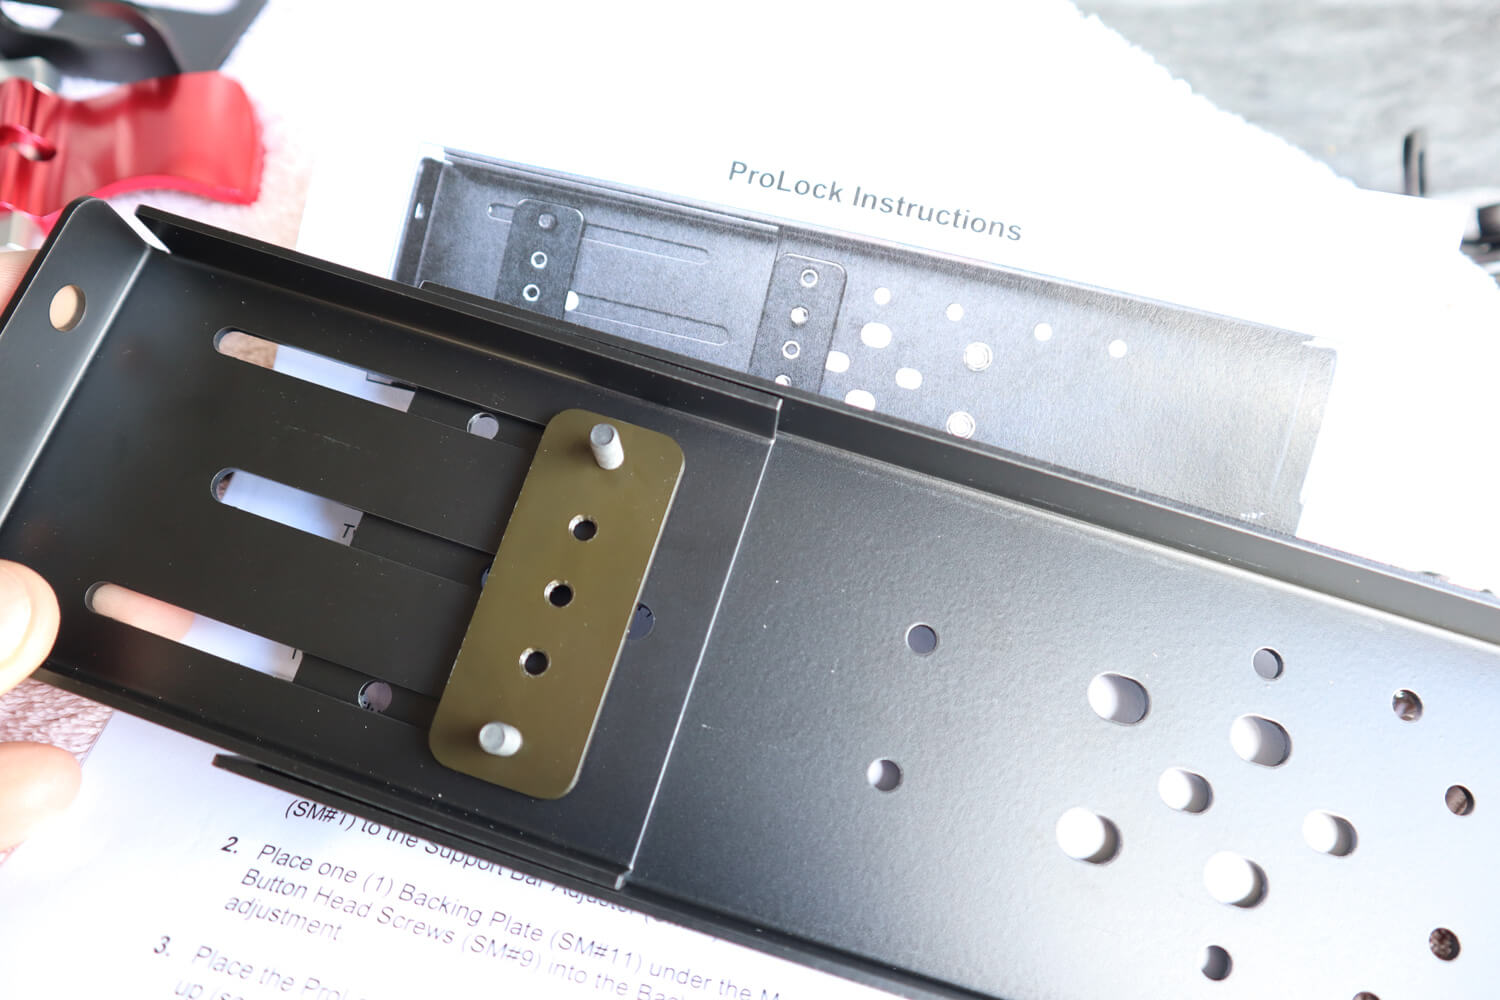
4. Next, assemble the ProLock quick release base to the main support bar using the two 10/32 flush mount screws with backing plate and the two M5 flush mount screws with M5 washers and M5 nylon lock nuts.

5. Loosely assemble the large mounting tab and extension arm for each side of the support bar using the 5/16” cap screw hardware with washers on each side and retained by the 5/16” nylon lock nut. You will want to face the large mounting tab’s “ear” facing inboard as shown for both sides. At this time, you can remove the factory 15mm retaining nuts and place the large mounting tabs over the studs in the floor pan. Reinstall the 15mm nuts and tighten to 35 ft-lbs, ensuring the mounting tabs stay parallel to each other.
6. Place the assembled support bar as shown to allow access for installation of the remaining 5/16” cap screws, washers, and nylon lock nuts on the opposite ends of both extension arms. Again, tighten until snug to still allow final adjustment/location of the mounting bracket.
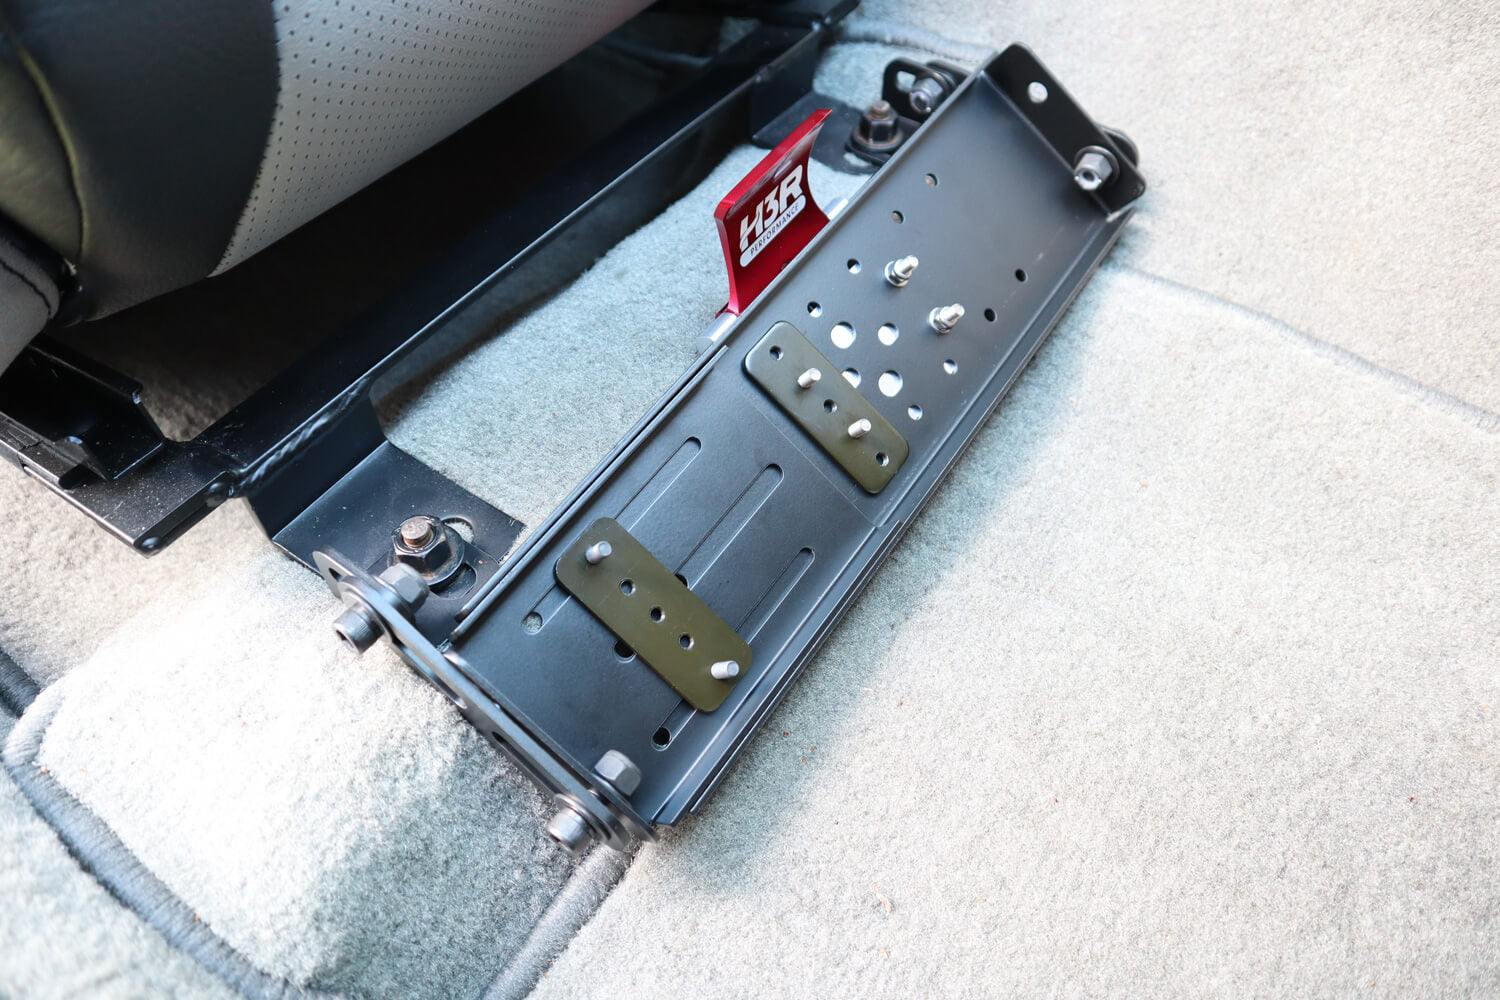
7. Adjust the placement of the assembled support bar to your desired height/angle. We recommend as far forward and as low as possible horizontally for passenger leg comfort and forward seat adjustment. Another option is to rotate the assembled support bar to a vertical position with the ProLock quick release tab on top. Try both positions and see what works best for you.
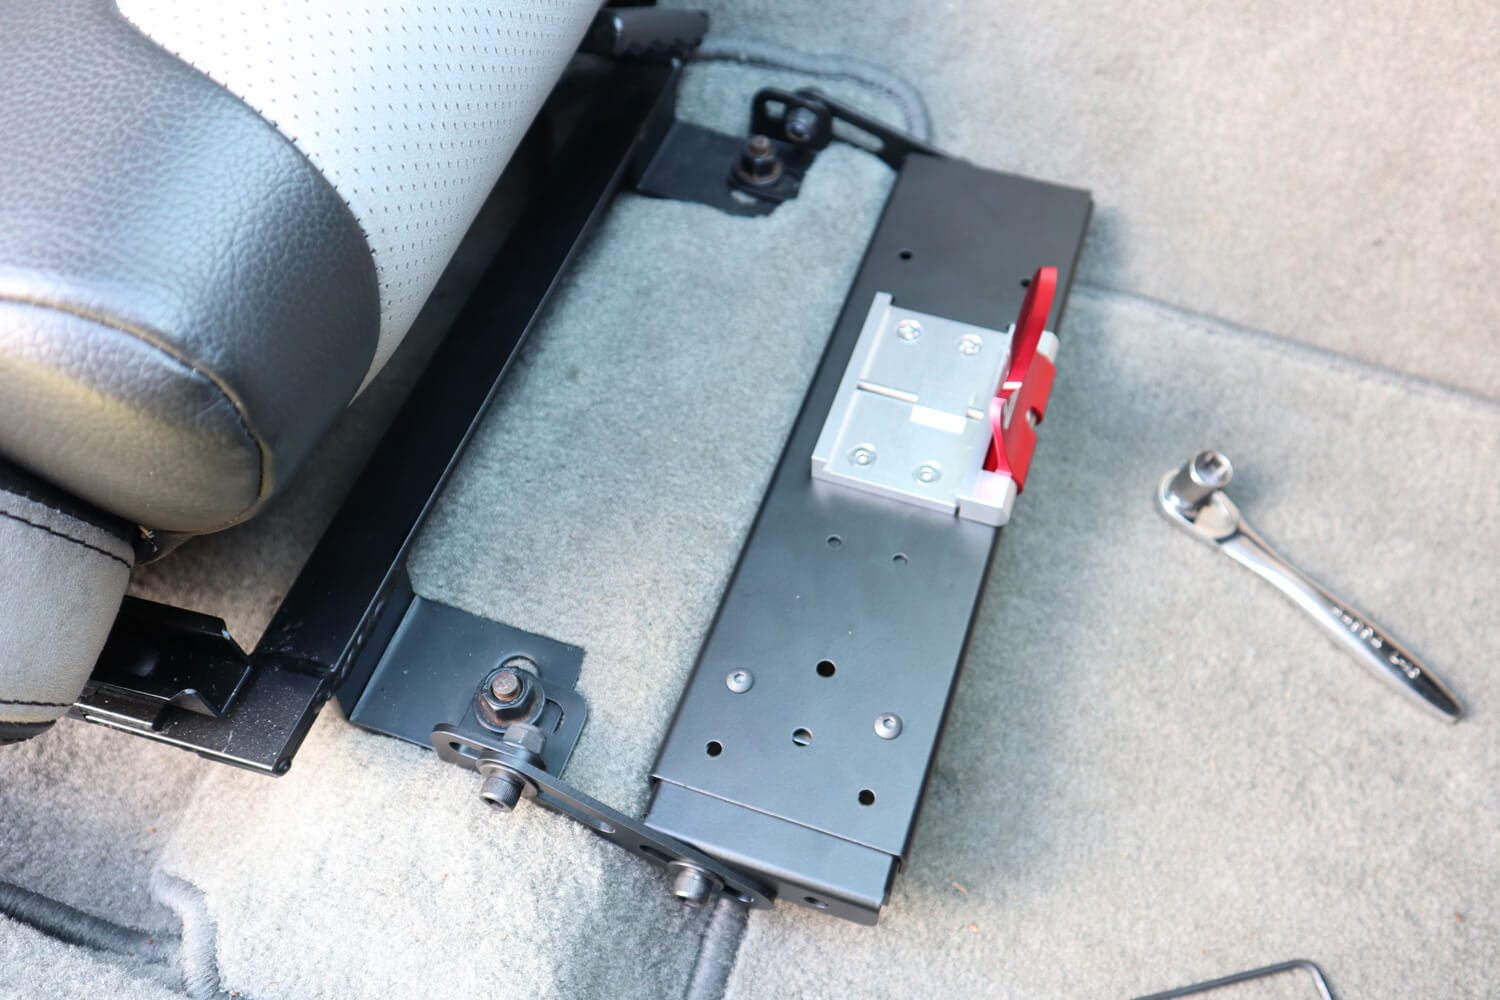
8. Once you have the assembled support bar positioned how you want it, carefully rotate the assembled support bar and extension arms as one, using the mounting bolts at the mounting tabs as a pivot point, to provide tool access to tighten the 5/16” cap screws and lock nuts at the support bar end. Finally, rotate the assembly back down into place and tighten the 5/16” cap screws and lock nuts at the mounting tabs.
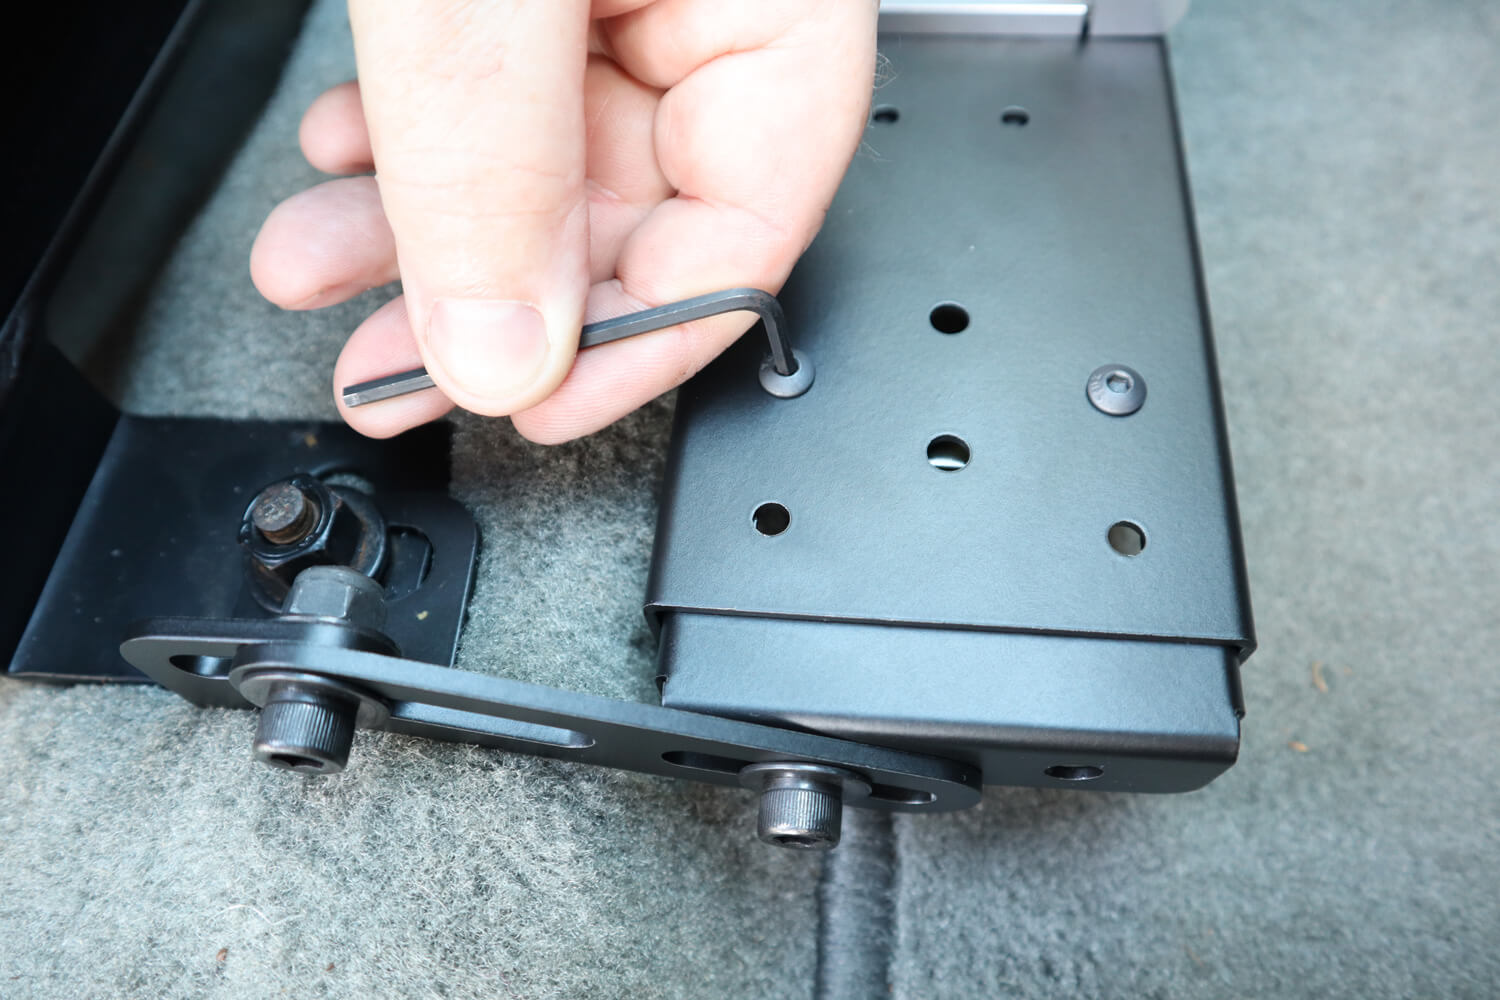
9. The final step to installing the Fire Extinguisher Seat Mount and ProLock quick release bracket base is to tighten the two 10/32” button head screws to lock in the width adjustment of the support bar assembly. Now let’s wrap things up by installing the ProLock fire extinguisher clamp rings and check our fire extinguisher fitment.
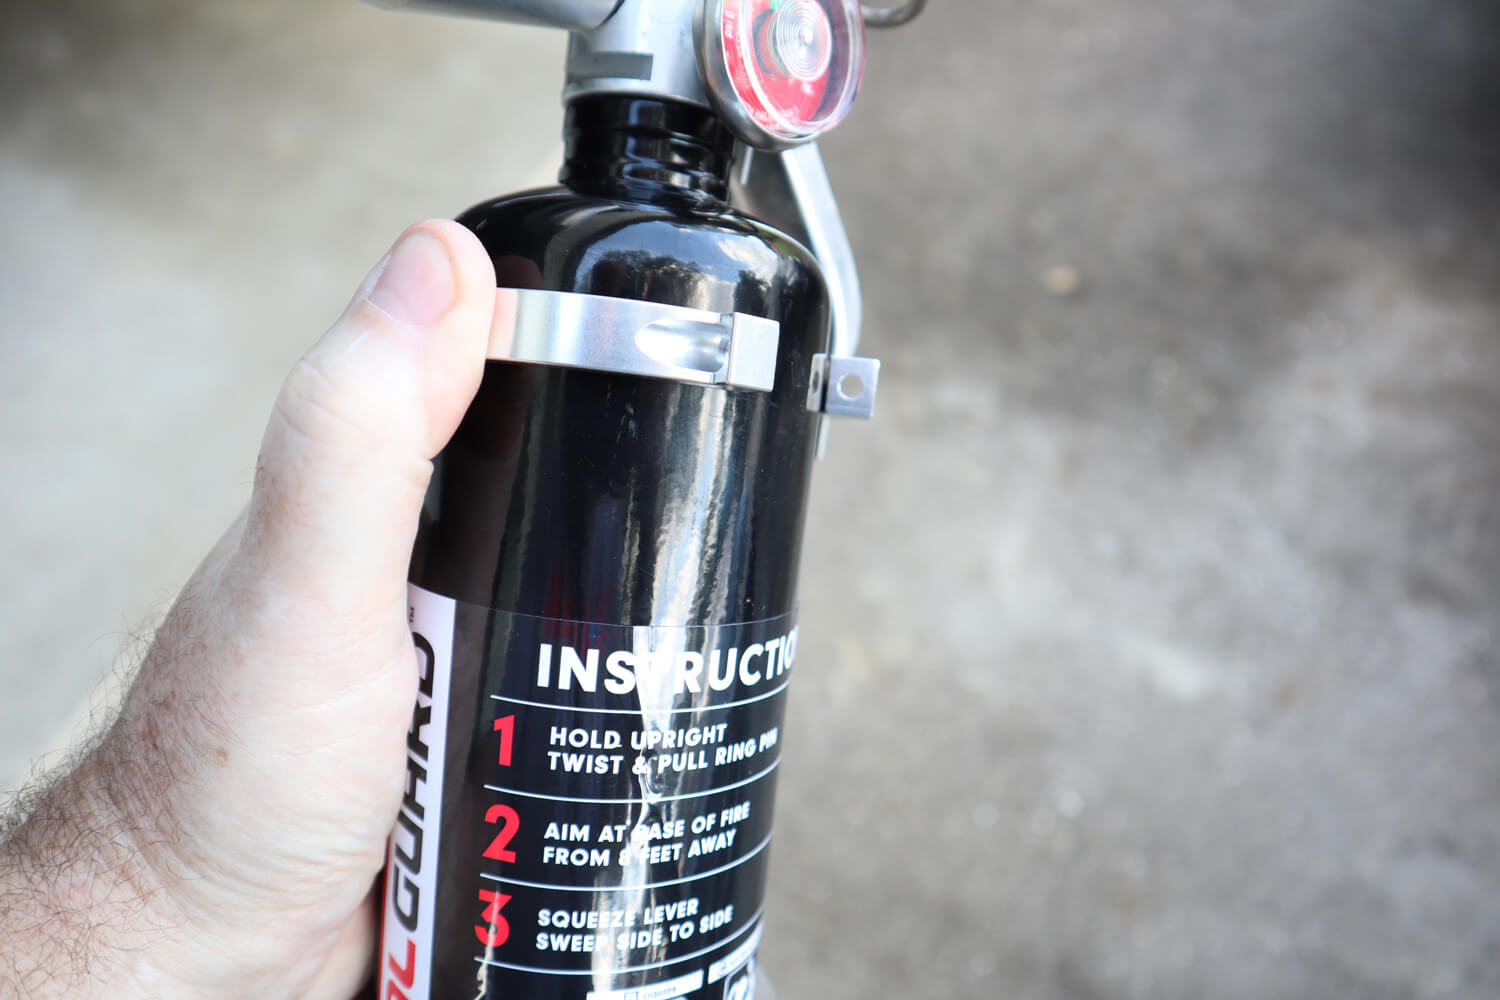
10. For the H3R Performance HalGuard clean agent extinguisher mounting the ProLock clamping rings are installed by placing the ring at the neck of the extinguisher and then sliding them down over the body, as shown.
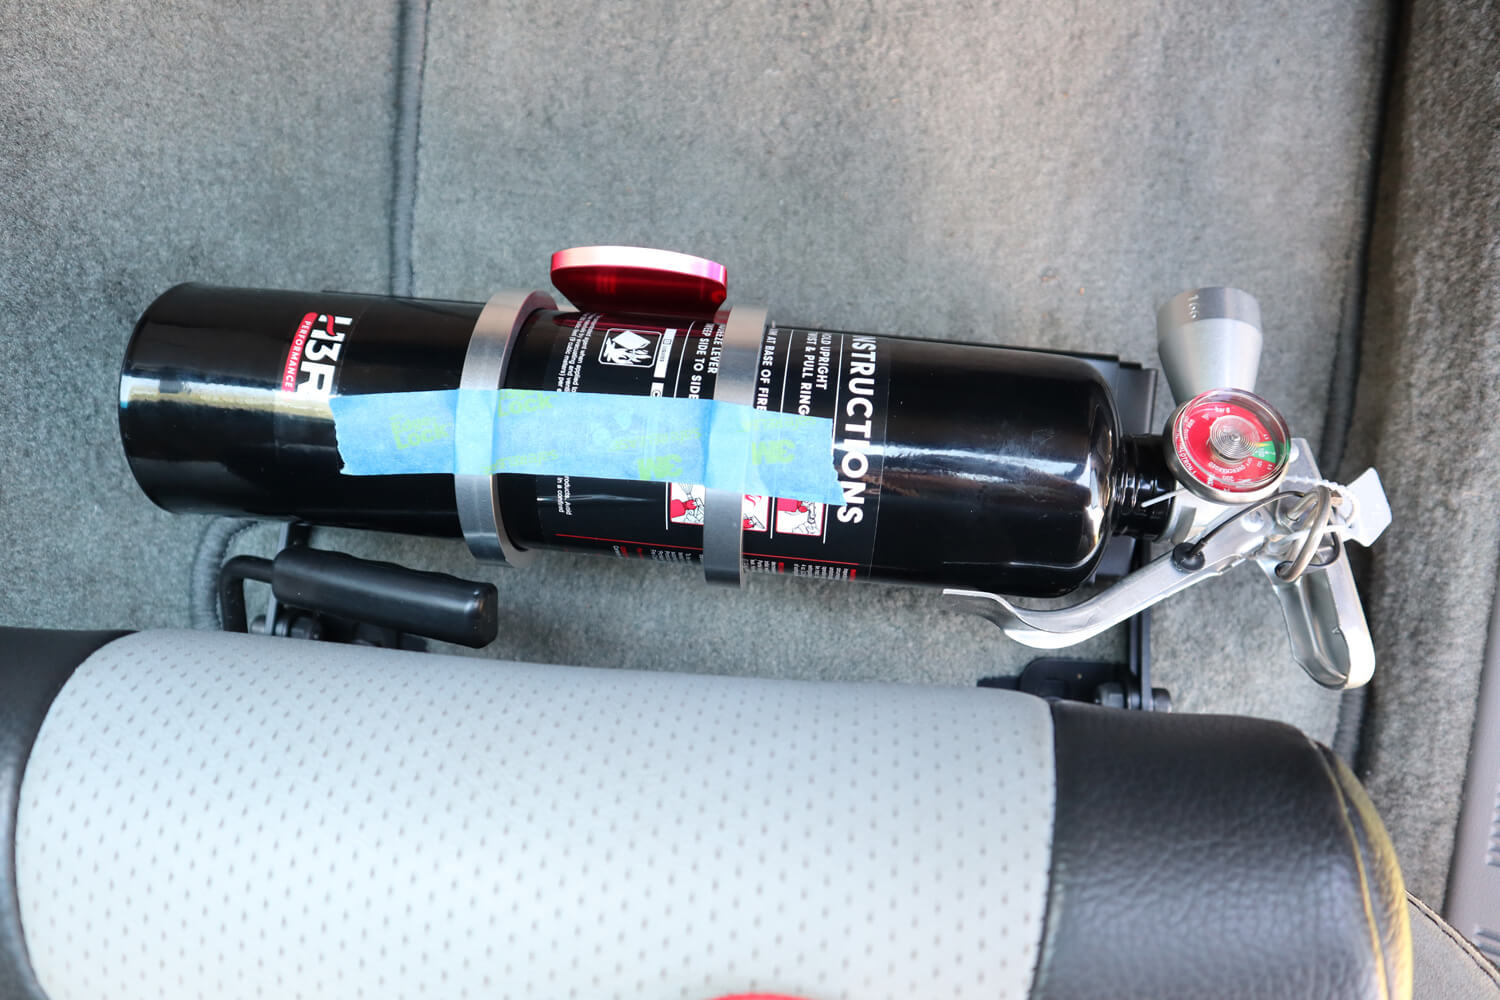
11. Align the clamping rings with the ProLock quick release bracket back and install the four M4 Allen cap screws in just a few threads each.
12. Place the assembled ProLock quick release and fire extinguisher into the ProLock base and close the quick release handle. Adjust the fire extinguisher position to ensure it clears any obstacles, like the seat track adjustment handle, and the extinguisher activation handle and discharge nozzle is clocked in your preferred position. Apply a length of painter’s tape, as shown to secure the final positioning and then remove the extinguisher with assembled ProLock quick release and tighten all four clamping ring screws.
13. Our final installation provides quick access to our HalGuard unit if needed, while offering a safe and secure installation that does not impede ingress/egress and still provides ample legroom and seat adjustment. While not shown here, you may opt to mount the Fire Extinguisher Seat Mount and ProLock quick release bracket between the seat frame and seat track so that it moves with the seat adjustment, but the extinguisher will sit higher.
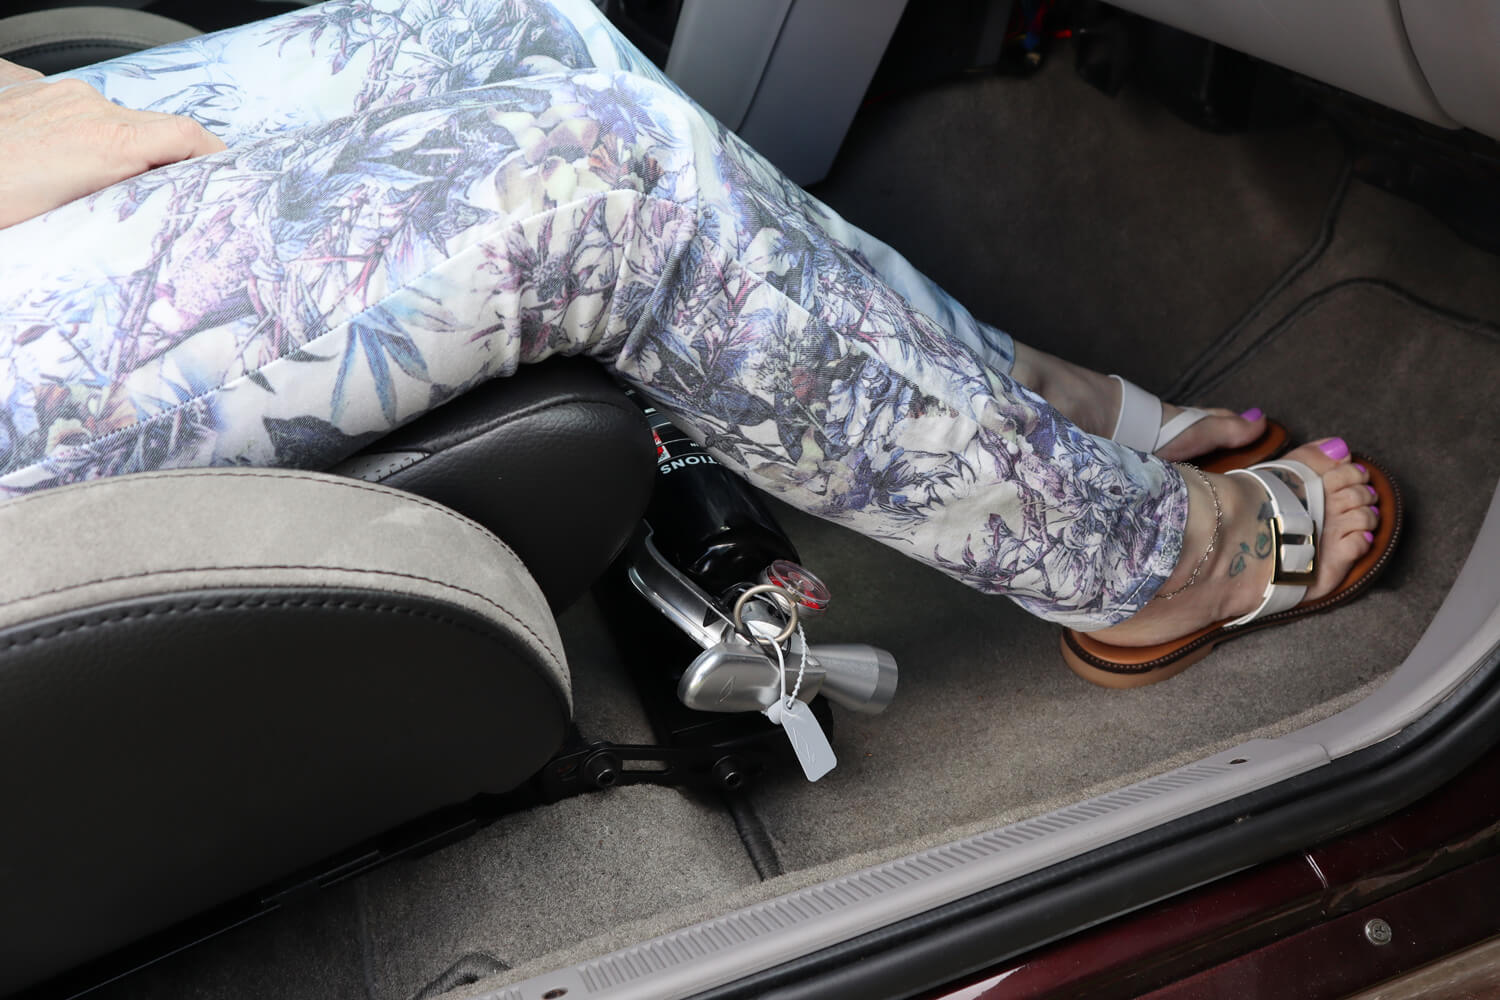
Final install

| Shop Seat Mount |